

Wednesday 16 June 2010

Click here to view Animation
Blue fairy
Tutorial written by and © to Bits N Bobs 16th June 2010.
Results are for personal use only.
No monetry gain allowed and that includes placing them behind a paid or donation based membership area.
You are not allowed to share/forward or translate any of my tutorials or place them on any blog, website, DVD or anywhere else without my permission.
These tutorials are written from my own ideas and any similarities to any other tutorial is purely coincidental.
All tutorials are for those with a working knowledge of paintshop pro.
I reserve the right to amend these terms at any time.
Supplies needed.
Font of choice for your name.
I am using Mtf Mikayla
Tube of choice.
I am using Fairy winter by Selina Fenech
Tube is not to be used without a C.I.L.M license
Halfway to heaven kit available here by Cazie's Designs
I have used the following items from the above kit.
Glitter frame, Paper 4, Ladder, Doodle 2,
Mask of choice. I am using Vix_363 by Vix.
Plugin Alienskin Xenofex
Note
This tutorial was written in PSP 9 and needs animation shop for the animation.
Open all supplies in paintshop except the font.
Double click on your font and minimize.
Open a new image, 500 x 500 at 72 dpi.
1.Re-size the paper to 500 pixels wide,
copy, paste as a new layer on your working image.
Layers merge, merge visible.
Re-name this layer to bg.
Layers/ load mask/ load mask from disk.
Setting in screen shot below.
Layers/ merge/ merge group

2.Re-size glitter frame to 350 pixels wide,
copy, paste as a new layer add a drop shadow of your choosing.
Duplicate this layer twice so you have 3 layers of the frame.
Re-name the bottom frame layer to frame 1, middle frame layer to frame 2 and top frame layer to frame 3
Activate the bottom frame 1 layer.
Effects/ Plugins/ Alien skin Xenofex 2/ Constellation, Settings are in the screenshot below.
Repeat with frame 2 layer but hit the random seed button once and then click ok.
Repeat with frame 3 layer, hit the random seed button once again and then click ok.

3.Re-size the ladder to 400 pixels high,
copy, paste as a new layer, re-name layer to ladder.
Use your raster deform tool and the shift button to shape the ladder to your liking.
Add a drop shadow of choice.
4.Re-size doodle 2 to 400 pixels high,
copy, paste as a new layer, re-name layer to doodle 2.
Duplicate layer, image mirror, position. Layers/ merge/ merge down.
Add a drop shadow of choice.
5.Re-size tube to 300 pixels high,
copy, paste as a new layer, re-name layer to tube,
position about half way up your ladder.
Add a drop shadow of choice.
Add any text your require.
6.Layers/ new raster layer, name it copyright.
Add all your copyright info.
*** Note:
Save now or continue for the animation steps
*** End note:
7.Close layers frame 2 and frame 3,
Activate frame 1 layer, layers/ merge/ merge all flatten and copy.
Open up Animation shop and paste as a new animtion.
Go back to Paintshop, undo, close layer frame 1.
Open and activate layer frame 2, layers/ merge/ merge visible and copy.
Go back to Animation shop and paste after current frame.
Go back to Paintshop, undo, close layer frame 2.
Open and activate layer frame 3, layers/ merge/ merge visible and copy.
Go back to Animation shop and paste after current frame.
8.Create your name in paintshop as normal, copy the file and paste as a new animation into animation shop.
Copy the name in animation shop, activate your animation, edit/ select all, edit/ paste into selected frame and then file/save as.
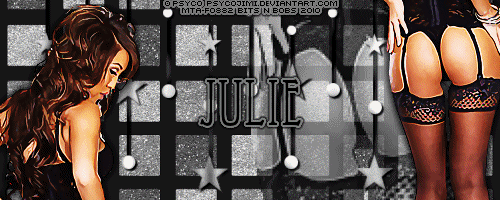
Waiting for you
Tutorial written by and © to Bits N Bobs 16th June 2010.
Results are for personal use only.
No monetry gain allowed and that includes placing them behind a paid or donation based membership area.
You are not allowed to share/forward or translate any of my tutorials or place them on any blog, website, DVD or anywhere else without my permission.
These tutorials are written from my own ideas and any similarities to any other tutorial is purely coincidental.
All tutorials are for those with a working knowledge of paintshop pro.
I reserve the right to amend these terms at any time.
Supplies needed.
Font of choice for your name.
I am using Essentric std
Tube of choice.
I am using Waiting for you free tube by Psyco Jimi
Tube is not to be used without an MTA license
Elegant New Year kit available here by C.C.Creationz
I have only used the following items from the above kit.
Paper 1, Star curtain,
Plugin hsb noise - Eyecandy 4000
Note
This tutorial was written in PSP 9 and needs animation shop for the animation.
Open all supplies in paintshop except the font.
Double click on your font and minimize.
Open a new image, 500 w x 200 h at 72 dpi.
1.Re-size the paper to 500 pixels wide,
copy, paste as a new layer on your working image.
Layers merge, merge visible.
Re-name this layer to bg.
2.Re-size Star curtain to 500 pixels wide,
copy, paste as a new layer add a drop shadow of your choosing.
Duplicate this layer twice so you have 3 layers of star curtains.
Re-name the bottom star layer to star 1, middle layer to star 2 and top layer to star 3
Activate the bottom star 1 layer.
Effects/ Eye candy 4000/ HSB noise, Settings are in the screenshot below.
Repeat with star 2 layer but hit the random seed button once and then click ok.
Repeat with star 3 layer, hit the random seed button once again and then click ok.

3.Activate your tube, press Shift + D.
On the first tube re-size to 1200 pixels high,
copy, paste as a new layer onto your working image.
Re-name layer to tube 1.
Move this layer to above the bg but below the star 1 layer.
Position to your liking.
Mine is on the right hand side showing her butt.
Adjust the layer blend mode to Luminance.
Lower the layer opacity to 65%
4.Activate star layer 3, copy your original tube,
paste as a new layer, re-name layer to tube 2.
Add a drop shadow of choice and position to your liking.
I have mine right over on the right hand side showing her butt and legs.
Duplicate this layer and position over on the left hand side with her face showing.
Re-name this layer to tube 3.
5.Layers/ new raster layer, name it copyright.
Add all your copyright info.
*** Note:
Save now or continue for the animation steps
*** End note:
6.Close layers star 2 and star 3,
Activate star 1 layer, layers/ merge/ merge visible and copy.
Open up Animation shop and paste as a new animtion.
Go back to Paintshop, undo, close layer star 1.
Open and activate layer star 2, layers/ merge/ merge visible and copy.
Go back to Animation shop and paste after current frame.
Go back to Paintshop, undo, close layer star 2.
Open and activate layer star 3, layers/ merge/ merge visible and copy.
Go back to Animation shop and paste after current frame.
7.Create your name in paintshop as normal, copy the file and paste as a new animation into animation shop.
Copy the name in animation shop, activate your animation, edit/ select all, edit/ paste into selected frame and then file/save as.
Tuesday 15 June 2010

You're Next
View animation here
Tutorial written by and © to Bits N Bobs 15th June 2010.
Results are for personal use only.
No monetry gain allowed and that includes placing them behind a paid or donation based membership area.
You are not allowed to share/forward or translate any of my tutorials or place them on any blog, website, DVD or anywhere else without my permission.
These tutorials are written from my own ideas and any similarities to any other tutorial is purely coincidental.
All tutorials are for those with a working knowledge of paintshop pro.
I reserve the right to amend these terms at any time.
Supplies needed.
Font of choice for your name.
I am using MTF Peach Cobbler
My word art here
Tube of choice.
I am using Revolution Calling free tube by James Jacks
Tube is not to be used without an MTA license
Goodbye love kit available here by Addicted to Scraps
I have used the following items from the above kit.
PP10, GBL64, GBL11, GBL12, GBL60 and GBL19
Note
This tutorial was written in PSP 9
Open all supplies in paintshop except the font.
Double click on your font and minimize.
Open a new image, 400 w x 150 h at 72 dpi.
1.Re-size the paper to 500 pixels wide,
copy, paste as a new layer on your working image.
2.Re-size GBL64 to 500 pixels wide,
copy, paste as a new layer add a drop shadow of your choosing.
Copy your tube, paste as a new layer, position to your liking.
Add a drop shadow of your choosing.
Copy GBL60 paste as a new layer, position and add a drop shadow.
3.Re-size GBL11 and GBL12 to 50 pixels wide,
copy, paste each on a new layer and position.
Add drop shadows to each if you wish.
4.Re-size GBL19 to 300 pixels wide,
copy, paste as a new layer and position top center.
Add drop shadows if you wish.
5.Re-Copy and paste the word art ( or type your own ) as a new layer,
add a drop shadow if you want one.
*** Note:
You can add your copyright and name now and export as a png file if you wish or continue for the animated version
*** End note:
7.Add a new raster layer then add all your copyright info.
Close the background and checken wire layer.
Layers/ merge/ merge visible.
Copy the merged layer, paste as a new image.
Minimise this new image for now.
We will need it after we have been in animation shop.
8.Re-open the background and chicken wire layers.
Activate the chicken wire layer, layers/ merge/ merge all flatten.
Copy this new merged layer.
9.Open animation shop.
Right click, paste as a new animation.
Effects/ insert image effect/ Shaky cam
Settings as in the screenshot below.

10.Back in paintshop open up the new image you pasted.
Copy, go back to animation shop.
Edit/ select all, edit/ paste into selected frame, left click as soon as you see the image.
Do not move your mouse prior to clicking or the image won't line up.
View/ animation, file/save as.
11.Create your name in paintshop as normal, copy the file and paste as a new animation into animation shop.
Copy the name in animation shop, activate your animation, edit/ select all, edit/ paste into selected frame and then file/save as.

Whimsy
Tutorial written by and © to Bits N Bobs 15th June 2010.
Results are for personal use only.
No monetry gain allowed and that includes placing them behind a paid or donation based membership area.
You are not allowed to share/forward or translate any of my tutorials or place them on any blog, website, DVD or anywhere else without my permission.
These tutorials are written from my own ideas and any similarities to any other tutorial is purely coincidental.
All tutorials are for those with a working knowledge of paintshop pro.
I reserve the right to amend these terms at any time.
Supplies needed.
Font of choice for your name.
I am using MTF Loli's Handwriting
Tube of choice.
I am using Lily of the valley by Rachel Anderson
Tube is not to be used without a C.I.L.M license
Plugins
Xero - Fritillary in filter set 4
Eye candy 5 Impact - Gradient glow
Alien skin Xenofex
Whimsy tagger kit available here by Baby Cakes Scraps
have used the following items from the above kit.
Ribbon frame, Rainbow, Filler,
Note
This tutorial was written in PSP 9
Open all supplies in paintshop except the font.
Double click on your font and minimize.
Open a new image, 500 x 500 at 72 dpi.
1.Re-size the ribbon frame to 400 pixels wide.
Copy, paste as a new layer onto your working image.
With your magic wand and the settings as in the screen shot below
select the center of your frame.
Flood fill with a colour of your

2.Layers/ new raster layer, Selections/ modify/ expand by 2.
Flood fill with a colour of your choice from your tube.
Layers/ arrange/ send to bottom, Selections/ select none.
Effects/ plugins/ Xero/ Fritilliary settings in screenshot.

3.Re-size your rainbow to 200 pixels wide,
copy, paste as a new layer, position to your liking
and move the layer to below the ribbon frame.
4.Activate your ribbon frame,
Effects/ plugins/ eye candy impact/ gradient glow with the settings as in the screenshot.

5.Re-size the filler flowers to 400 pixels wide,
copy, paste as a new layer, position to your liking at the bottom of the ribbon frame.
Layers/ arrange/ bring to the top.
Effects/ plugins/ eye candy impact/ gradient glow with the settings as before.
6.Re-size your tube to 250 pixels high,
copy, paste as a new layer, position to your liking.
Effects/ plugins/ eye candy impact/ gradient glow with the settings as before.
*** Note:
You can add your copyright and name now and export as a png file if you wish or continue for the animated version
*** End note:
7.Layers/ merge/ merge all flatten.
Add your copyright info.
Hold down your shift key use your magic wand with settings as below and select several different areas where you would like to see a sparkle.
Mode: replace,
Match mode:
RGB value,
Tolerance: 0,
Contiguous: checked,
Feather: 0,
Anti-alias: unchecked
8.Press shift and D twice. You will now have 3 files.
On the first one effects/ plugins/ alien skin xenofex 2 , use settings as in screen shot below. Selections/ select none.
File save image as 1
On the second one effects/ plugins/ alien skin xenofex 2 , use same settings but hit the random seed button once.
Selections/ select none. File save image as 2
On the second one effects/ plugins/ alien skin xenofex 2 , use settings and hit random seed button again.
Selections/ select none. File save image as 3
9.Open animation shop.
File/ animation wizard then follow the screen shots clicking next after each one.
On the add image part browse to where you saved your files and add them all, click next then finish.
View/ animation then file/save as.


10.Create your name in paintshop as normal, copy the file and paste as a new animation into animation shop.
Copy the name in animation shop, activate your animation, edit/ select all, edit/ paste into selected frame and then file/save as.
Sunday 13 June 2010

Rock bitch
Tutorial written by and © to Bits N Bobs 13th June 2010.
Results are for personal use only.
No monetry gain allowed and that includes placing them behind a paid or donation based membership area.
You are not allowed to share/forward or translate any of my tutorials or place them on any blog, website, DVD or anywhere else without my permission.
These tutorials are written from my own ideas and any similarities to any other tutorial is purely coincidental.
All tutorials are for those with a working knowledge of paintshop pro.
I reserve the right to amend these terms at any time.
Supplies needed.
Font of choice for your name.
I am using Parry Hotter
Tube of choice.
I am using Tarabe from Rachael Huntington
Tubes are not to be used without a C.I.L.M. license
I am using Vix_Mask346
Plugins
Xero - Fritillary in filter set 4
Eye candy 5 Impact - Gradient glow
Scrap kit 'Grunge Rock' by ZiggyFan
Scraps I am using from this kit are .......
Paper 2, Paper 12, Sticker 2, Swirl, base guitar, sticker 1,
Note
This tutorial was written in PSP 9
Open all supplies in paintshop except the font.
Double click on your font and minimize.
Open a new image, 500 x 500 at 72 dpi.
1.Re-size paper 2 to 500 pixels wide.
Copy, paste as a new layer onto your working image.
Layers/ Load/save mask/ Load mask from disk.
Settings are in the screenshot below.
Layers/ merge/ merge group.

2.Re-size paper 12 to 400 pixels wide.
Copy, paste as a new layer, layers/arrange, send to bottom.
3.Re-size sticker 2 to 350 pixels high.
Copy, paste as a new layer.
Layers/ arrange/ bring to top.
4.Re-size your tube if needed,
copy, paste as a new layer and position to your liking.
Activate the sticker 2 ( no entry sign ) layer,
Selections/ select all/ float/ defloat,
Selections/ modify/ contract by 3.
Activate your tube layer and erase any parts you don't want.
Selections/ defloat, erase any part hanging out the bottom.
5.Activate the sticker 2 ( no entry sign ) layer,
Selections/ select all/ float/ defloat,
Selections/ modify/ contract by 3.
Selections/ invert, erase the parts outside of the sticker.
Selections/ select none.
6.Re-size swirls to 450 pixels high, copy, paste as a new layer,
Layers/ arrange/ send to bottom.
7.Activate background paper,
effects/ plugins/ Xero/ Fritilliary settings in screenshot.

8.Re-size base guitar to 250 pixels high, copy, paste as a new layer,
layers/ arrange/ move up, repeat until it is above the no entry sign but below your tube.
Position to your liking.
Re-size sticker 1 to 150 pixels wide,
copy, paste as a new layer.
Position to your liking and move this layer to below the no entry sign.
9.Activate the bottom layer.
Effects/ plugins/ eye candy impact/ gradient glow with the settings as in the screenshot.
Activate and add the same to any other layers you wish.

10.Layers/ merge/ merge visible
Add all copyright/credit info and your name.
File/ export as png for transparent background or jpg for a coloured background.
Friday 11 June 2010

Want to earn yourself a free $5 gift certificate ?
Create a tutorial using any of my kits for the chance to win a $5 gift certificate for my store here
All applicants will have their names put into a box and my children will pick out the winner.
In my opinion this makes it fair on everyone who enters.
A lot of newbies are put off by more experienced tut entries so this way anyone can be a winner.
Competition closes on 6th July. Winner will be announced on 7th July.
Please send all competition tutorial links to scrappingbits@googlemail.com with 'BNB TUT CONTEST' in the subject line.
Good luck everyone :O)
Wednesday 9 June 2010
I am still in shock at learning of the passing of Leah from AMI.
I only spoke to her a few days ago :(
God bless you Leah, rest in peace honey.
I only spoke to her a few days ago :(
God bless you Leah, rest in peace honey.
Subscribe to:
Posts
(Atom)
Stores


BNB Blinkie


